📓 TDD with Jest: Testing the Triangle.prototype.checkType() Method
In this lesson, we'll continue practicing the RGR workflow by creating four more tests to develop the complete functionality of the Triangle.prototype.checkType() method. Before we dive into our second test, we're going to explain some choices that you have when organizing your tests.
Both Are Acceptable: Using one describe() Per Function or Per Object Type
We're embarking on writing tests for the next piece of functionality for the Triangle object: the Triangle.protoype.checkType() method. This brings up a question: should we create a new describe statement for this method? Or should we add the tests for this method to the Triangle describe block?
describe('Triangle', () => {
  // Tests for the Triangle object go in here!
});
Well, the truth is, we can pick either option.
When we initially started writing pseudocode tests in the Arrays and Looping course section, we wrote a new describe statement for every function, and often multiple tests for each function. This is a great choice for organization that you are welcome to continue with.
However, the organizational option to write one describe statement per object type is also acceptable, and this is exactly what we'll do in this lesson.
When making this decision it really comes down to determining which organization style is best for communication. This means that anyone who reads through your test files (including your future self) should be able to quickly determine what's being tested by reading the describe and test statements.
Test 2: Should Correctly Determine Whether Three Lengths Are Not a Triangle
What is the next simplest behavior we can test? Well, let's consider all of the things our application should be able to do:
- Check if three sides make a triangle or not
- Check if a triangle is scalene
- Check if a triangle is isosceles
- Check if a triangle is equilateral
In our case, the simplest behavior is the first one. Our method should return "not a triangle" if the three lengths provided can't make a triangle.
Once again, we need to start by writing a test. We shouldn't be modifying our source code yet. Instead our first step is to define the name of the method, what it returns, and any other details. Then we can take these details as the basic direction with which to write the actual method.
Here's our next test, which we'll add below our first test for the Triangle() constructor:
describe('Triangle', () => {
  ...

  test('should correctly determine whether three lengths are not a triangle', () => {
    const notTriangle = new Triangle(3,9,22);
    expect(notTriangle.checkType()).toEqual("not a triangle");
  });
});
We describe the test as concisely as possible: 'should correctly determine whether three lengths are not a triangle'. Then we instantiate a Triangle object with lengths that won't make a triangle because 22 > (3 + 9), and the length of one side cannot be greater than the sum of the length of the other two sides.
Note that we make our variable name descriptive in order to continue to communicate that we're testing for when a triangle is not a triangle. Then, call a new method called checkType().
When testing, we always write our test as if the method (or whatever we are testing) already exists — even if it doesn't. This helps us define how the method should be used. As always, methods should be clearly named, too.
Red Phase
Let's run $ npm test.
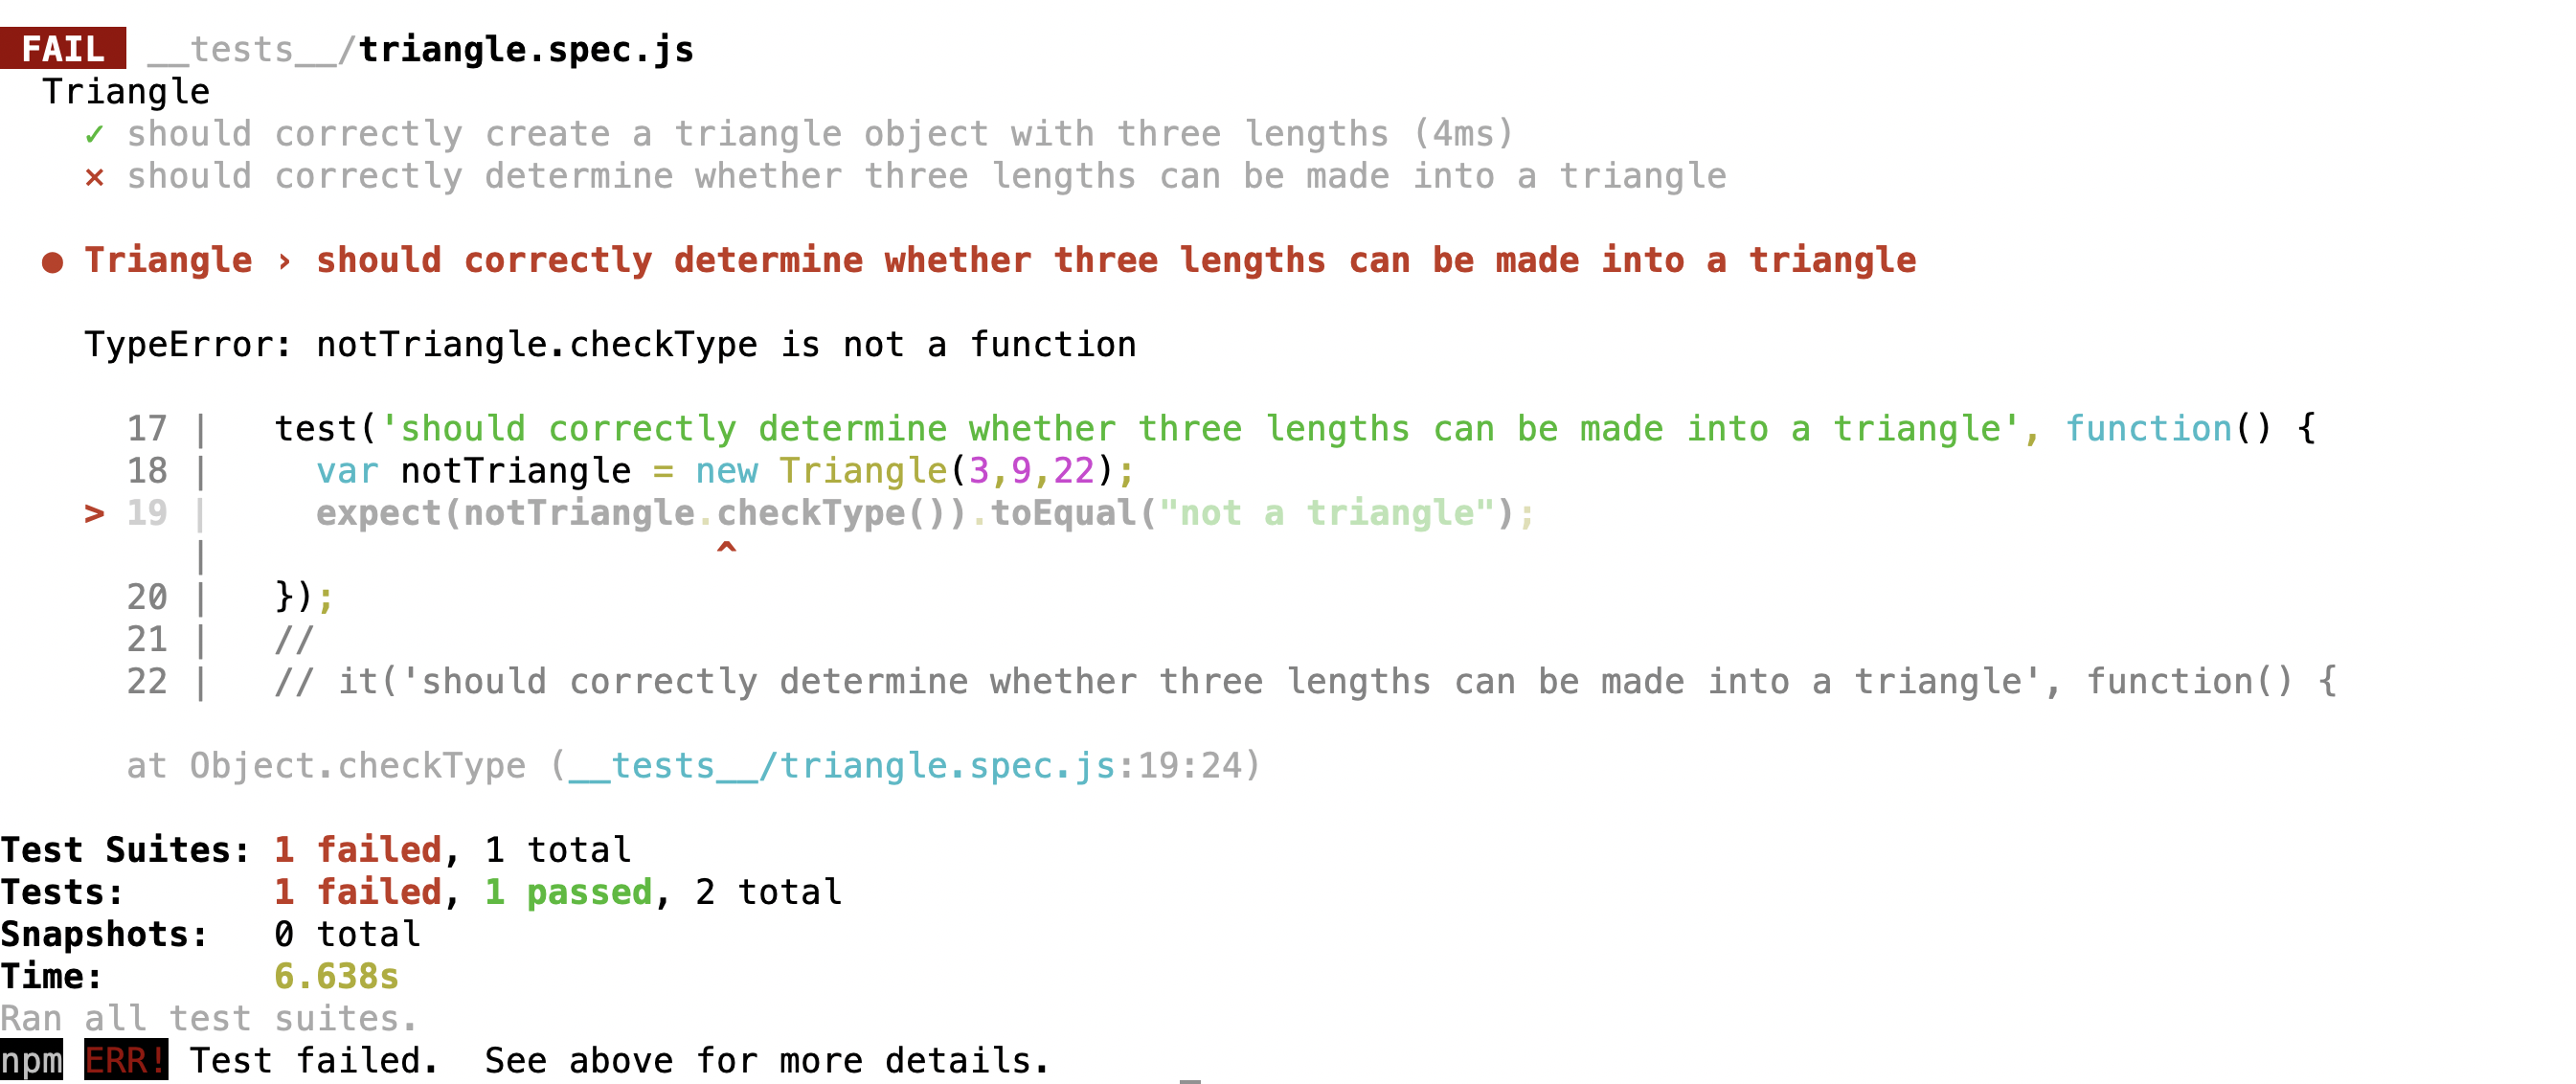
There's a fail as expected. Here's the error:
TypeError: notTriangle.checkType is not a function
Is this a good or a bad fail?
If you guessed it's a bad fail, you are correct. Once again, we aren't actually testing our new method. At the very least, we need to create the method itself. Let's do that now:
Triangle.prototype.checkType = function() {
  // Code will go here.
};
If we run the test, we'll get a meaningful fail:

This is a meaningful fail because the method is actually called. It returns exactly what we'd expect: undefined. Now that we know our test is correctly calling our method, we can be sure that any changes we make to the method will also change the result of the test.
If our test wasn't correctly calling this method, no amount of changes to Triangle.prototype.checkType() would ever make our test pass. This is another big benefit of getting a good fail first. Sometimes we'll see students write code that should get a test passing, but because it's never wired up correctly, the test continues to fail, leading to more development time and wrong turns as students unnecessarily go back to the drawing board.
Green Phase
Now let's add the code to make our new test pass:
...

Triangle.prototype.checkType = function() {
  return "not a triangle";
};
We want to add as little code as possible to make our test pass. Right now, we don't care about conditionals or anything else just yet. Our method just needs to return "not a triangle" and our test will pass. This may seem like too small of a change, but an incremental approach can be especially useful when trying to solve difficult problems.
Since we have another test passing, it's time to make a commit. Once again, always commit after you complete the green phase. And make sure you commit both the test and the updated source code.
Test 3: Determine Whether Three Lengths Make a Scalene Triangle
We're ready for our third test. Let's check whether or not a triangle is scalene. This means that all three sides must be different. Here's the test, which we'll add right below the previous test:
describe('Triangle', () => {
  ...

  test('should correctly determine whether three lengths make a scalene triangle', () => {
    const scalTriangle = new Triangle(4,5,7)
    expect(scalTriangle.checkType()).toEqual("scalene triangle");
  });
});
The pattern should now be clear and this test is very similar to our last test.
Red Phase
Next we complete the red phase by checking that our test fails:
$ npm run test
Since our Triangle.prototype.checkType() method has already been created, we don't have to do anything additional to get a good fail. In this case, we're confirming that there are no false positives when inputting the values that make a scalene triangle.
Green Phase
We can make this test pass by adding a conditional that checks if all three sides are different:
Triangle.prototype.checkType = function() {
  if ((this.side1 !== this.side2) && ((this.side1 !== this.side3)) && ((this.side2 !== this.side3))) {
    return "scalene triangle";
  } else {
    return "not a triangle";
  }
};
The code above checks to see if all three sides are different. If they are, our method will return "scalene triangle".
However, if we run our tests again, we'll get a failure:
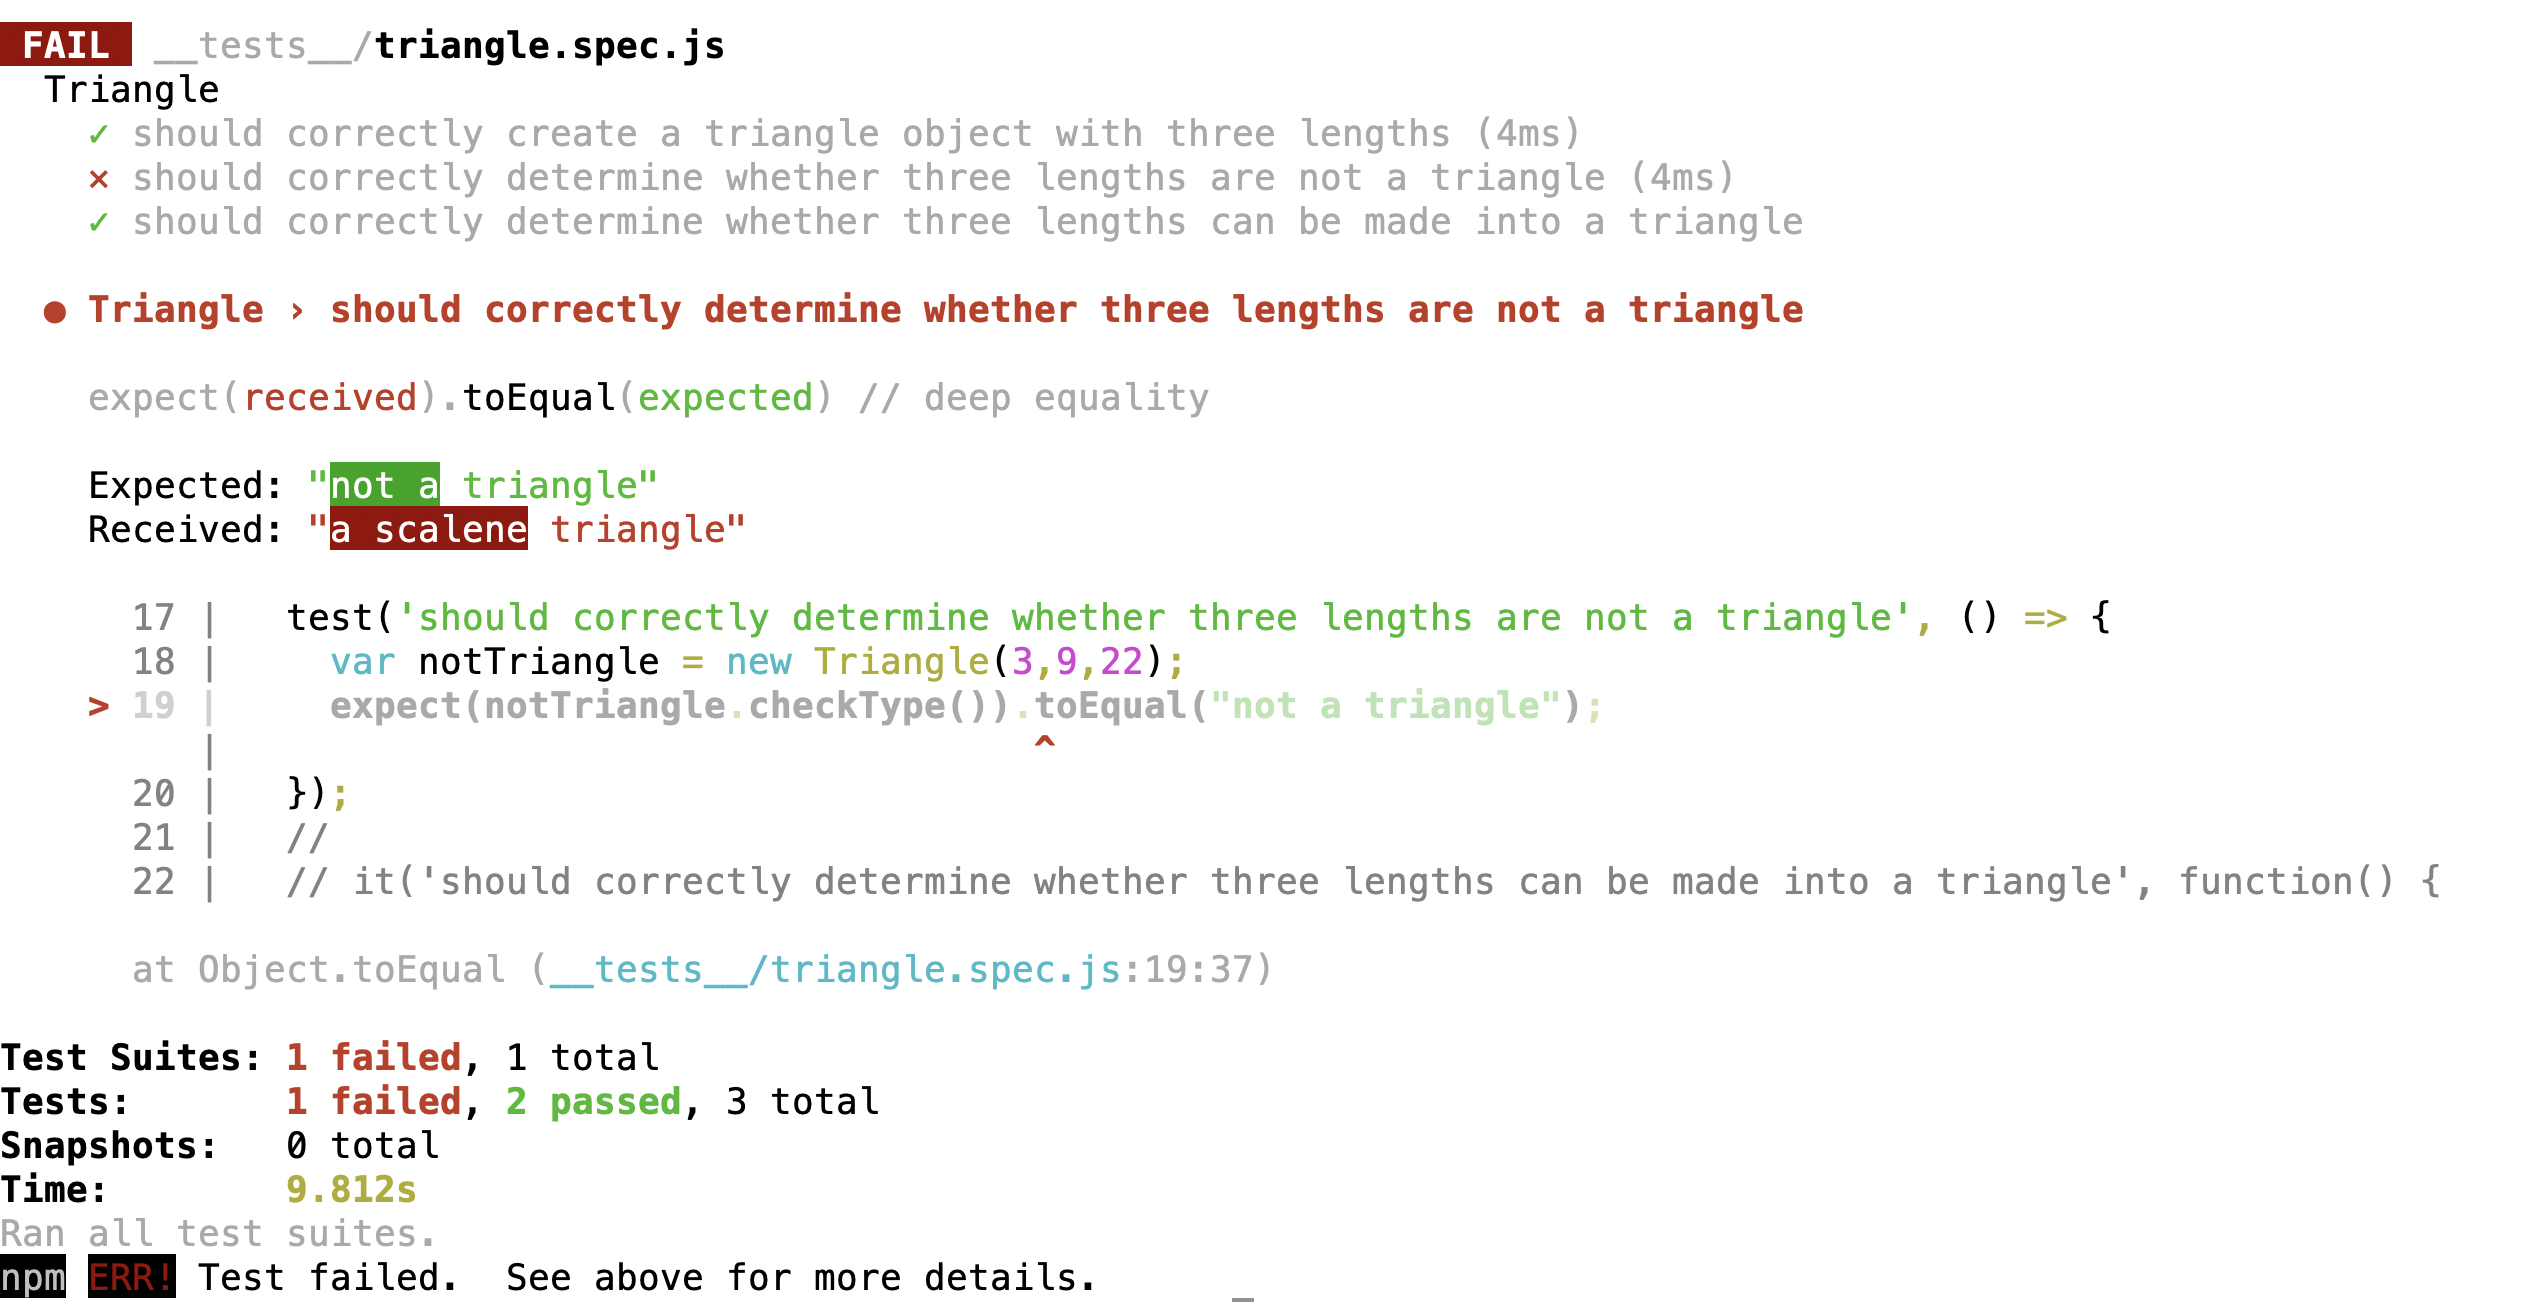
It's important to read the output carefully. If we take a closer look, we'll see that our new test is passing. Our method correctly checks if a triangle is scalene. However, our new code broke our previous test because an object can have three different length properties and not be a triangle.
This is part of the reason it is so important to write thorough tests. Sometimes the new code we write will break previous tests. If our tests are well-written, then it probably means there's something wrong with our code.
This is also why it's important to keep all our tests even if we have moved onto new code. As developers, we can make sure that changes don't break our code by running our test suite(s). In fact, this is a central part of a concept called continuous integration. Continuous integration is the process of automatically testing our code whenever a change is made. As long as we have a robust test suite, we can be reasonably confident that we aren't introducing bugs in our code. We just need to run our tests and make sure they are all passing.
We'll need to refactor our code to get our tests to pass. Specifically, we'll need to add a conditional that actually checks whether the value of one side is greater than the sum of the other two sides.
...
Triangle.prototype.checkType = function() {
  if ((this.side1 > (this.side2 + this.side3)) || (this.side2 > (this.side1 + this.side3)) || (this.side3 > (this.side1 + this.side2))) {
    return "not a triangle";
  } else if ((this.side1 !== this.side2) && ((this.side1 !== this.side3)) && ((this.side2 !== this.side3))) {
    return "scalene triangle";
  }
};
Now when we run $ npm run test, our tests will pass again. Time to commit the tests and code!
Test 4: Determine Whether Three Lengths Make an Isosceles Triangle
We're ready to test whether a triangle is isosceles. That means two lengths (but not all three) must be equal. See if you can figure out the test on your own first. It's very similar to the ones we've written so far.
Here's the test, and we'll add it right below the previous test:
describe('Triangle', () => {
  ...

  test('should correctly determine whether three lengths make an isosceles triangle', () => {
    const isoscTriangle = new Triangle(5,5,7)
    expect(isoscTriangle.checkType()).toEqual("isosceles triangle");
  });
});
Red Phase
Next, we complete the red phase by checking that our test fails:
$ npm run test
Since our Triangle.prototype.checkType() method has already been created, we don't have to do anything additional to get a good fail. In this case, we're confirming that there are no false positives when inputting the values that make an isosceles triangle.
Green Phase
We just need to add another conditional to our method to make the test pass:
Triangle.prototype.checkType = function() {
  if ((this.side1 > (this.side2 + this.side3)) || (this.side2 > (this.side1 + this.side3)) || (this.side3 > (this.side1 + this.side2))) {
    return "not a triangle";
  } else if ((this.side1 !== this.side2) && ((this.side1 !== this.side3)) && ((this.side2 !== this.side3))) {
    return "scalene triangle";
  }  else if ((this.side1 === this.side2) || ((this.side1 === this.side3)) || ((this.side2 === this.side3))) {
      return "isosceles triangle";
    }
};
Next, run $ npm test to confirm that the new test and all other tests are passing.
Even if it seems we aren't adding a ton of code, it's time to commit again. We can ensure that we have a great commit history that clearly shows our work.
Test 5: Determine Whether Three Lengths Make an Equilateral Triangle
This test is almost exactly the same as our prior tests but we still need to write it. It would be very easy to make a mistake in our conditionals that might result in an equilateral triangle being identified as something else.
We'll start with the test, adding it right below the last test:
describe('Triangle', () => {
  ...

  test('should correctly determine whether three lengths make an equilateral triangle', () => {
    const equiTriangle = new Triangle(5,5,5)
    expect(equiTriangle.checkType()).toEqual("equilateral triangle");
  });
});
Red Phase
If we run this test, we'll get a fail as expected. However, the fail gives us an interesting piece of information:
Expected: "equilateral triangle"
Received: "isosceles triangle"
It's very important to read our fail messages clearly. It's not just about making sure we have a meaningful fail. We may learn other information in the process.
In this case, we can see that the current conditional for an isosceles triangle applies for an equilateral triangle as well. By paying attention to this information, we can avoid gotchas like this one! What we've learned here is that if we add an else statement for the equilateral triangle to the end of our conditional, our method will mistakenly say an equilateral triangle is isosceles.
As we can see, our test hasn't just helped us test our code — it has actually informed the process of writing the code itself.
Green Phase
There's several ways we can solve this problem. Here's one of them:
Triangle.prototype.checkType = function() {
  if ((this.side1 > (this.side2 + this.side3)) || (this.side2 > (this.side1 + this.side3)) || (this.side3 > (this.side1 + this.side2))) {
    return "not a triangle";
  } else if ((this.side1 !== this.side2) && ((this.side1 !== this.side3)) && ((this.side2 !== this.side3))) {
    return "scalene triangle";
  } else if ((this.side1 === this.side2) && (this.side1 === this.side3)) {
      return "equilateral triangle";
  } else {
    return "isosceles triangle";
  }
};
Since we know that our previous conditional for an isosceles triangle is also true for an equilateral triangle, we update that condition to apply to equilateral triangles instead. Then our else statement will apply for isosceles triangles.
If we run our tests again, everything is green and passing. And, as always, we should commit our work.
Considering Edge Cases
At this point, it may seem like we are done — with the testing at least. Indeed, we have completed the functionality we sought to achieve.
However, our testing could still be more thorough. We should consider as many possible use cases for the Triangle.prototype.checkType() method. Extreme use cases are called edge cases. There are a number of other things this method should probably handle — technically they aren't extreme enough to be edge cases, but they can still be common gotchas if we don't think things through. These should be familiar from the introduction to whiteboarding:
- What happens if words or arrays are passed into the constructor?
- What happens if a number is passed into the constructor but it's in string format?
- What happens if negative numbers are passed in?
- Would it be better to pass in triangle lengths as arguments to the
Triangle.prototype.checkType()method or should they be passed into the constructor as we do here?
Good developers think through these problems, write tests for them, and then update their code to handle a wide range of use cases.
Next Steps
You will be expected to write thorough tests for the upcoming independent project. The next lesson will cover testing best practices that we want you to implement in your practice projects in preparation for the independent project. Optionally, review the TDD and Environments with JavaScript Independent Project lesson for a preview of expectations for the independent project.
The following repository link includes all code in the shape-tracker project up to this point. It also includes several configuration updates that we'll be making in the next few lessons to add testing coverage and debugging.
Example GitHub Repo for Shape Tracker
Make sure to use the branch titled 2_full_testing_with_jest as your point of reference. As needed, review the lesson on accessing code from different branches.